很多程序员们都会使用到Mind+软件,那么你们知道使用Mind+如何编写python程序吗?下文就为各位带来了使用Mind+编写python程序的方法,感兴趣的用户快来下文看看吧。
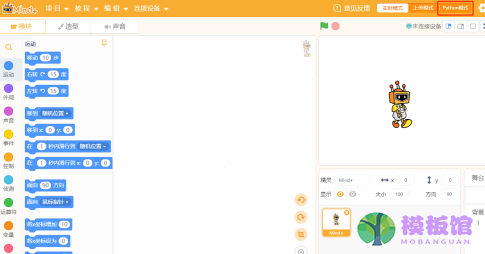
打开Mind+,点击窗口右上角的【Python模式】按钮,由实时模式切换到Python模式;
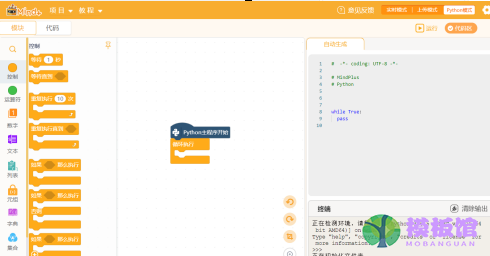
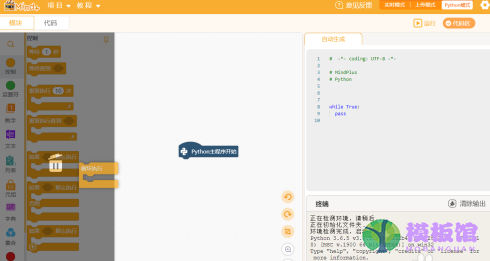
将默认的循环执行模块拖动到左边的模块区删除;
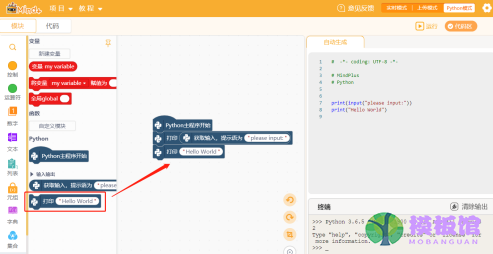
点击【变量】,将【打印“Hello World”】模块拼接到【Python主程序开始】下方;
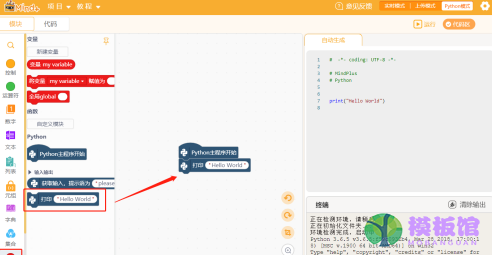
将【获取输入,提示语为“please input:”】拖放到编程界面,并将其拖放到【打印“Hello World”】中,组合成【打印 获取输入,提示语为“please input:”】;


再将一个新的【打印“Hello World”】模块拼接到【打印 获取输入,提示语为“please input:”】下方;
点击窗口右上方的【运行】按钮运行程序;

在窗口右下方的【终端】对话框输入【我的第一个Python程序】或者其他任意字符,按回车,

【终端】对话框会输出结果,这样便完成了在Mind+中编写Python程序。

以上就是小编给大家带来的使用Mind+编写python程序的方法,希望本文内容能帮助到大家!